You will need these:
1. Computer with software to lay out the type you want (I used Microsoft Word)
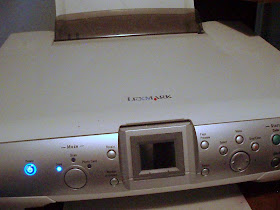
2. Printer
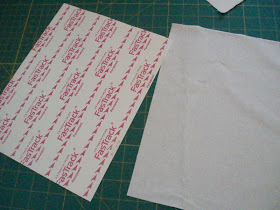
3. Freezer paper or full-page sticker paper
4. Iron
5. Prepared For Dying fabric (PFD) this is ESSENTIAL!
These are the steps:
1. Design your label, include any info you wish. Set this info up as a "text box".
2. Copy and paste as desired on your 8.5" x 11" page layout. Don't forget to give yourself room to cut apart and seam allowance to attach to your item!
3. Cut a piece of the PFD fabric to 8.5" x 11". Attach to either the full-page sticker, or a 8.5" x 11" piece of Freezer Paper. I used the sticker paper for this.

4. Print this page (I have a Lexmark P4350 ink jet printer).
I use the regular ink that I have in the printer.

5.Allow to dry completely.
6. After completely dry, remove sticker paper (or freezer paper) backing.
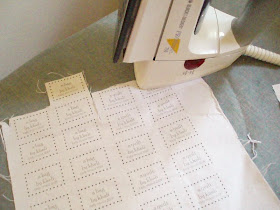
7. Heat set ink with a hot (cotton setting) iron.

8. Cut and attach to your item!
I apply double-sided fusible to the back, folding over edge to catch with the fusible. Then remove backing paper and fuse to the item, I then whip-stitch for a nice, smooth edge.
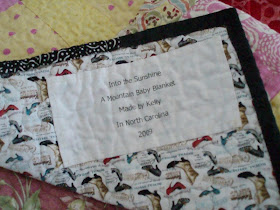
9. This creates a label that is wash-proof. This photo shows my label on a quilt after laundering.

Any comments or questions are welcome.
*my first tutorial!

Great tutorial Kheli! I have one question though - What is and where do you get PFD fabric?
ReplyDeletePFD is "Prepared For Dying" fabric. This is cotton fabric (looks like muslin) that has been washed to remove all sizing and chemicals. I have found it at JoAnne's Fabric and Hancock Fabric as well as Mary Jo's in Gastonia. You can find it on-line at Dharmatrading.com. Thanks for reading and thanks for the feedback!
ReplyDeleteGreat tutorial, thanks!!
ReplyDeleteIs there anything special about the PFD fabric? I mean, could I take my own muslin or plain cotton fabric and wash it to use?
This is VERY cool. So do you attach the freezer or sticker paper just to stiffin the fabric???
ReplyDeleteWhat a wonderful tutorial! Enjoyed your blog very much.Can't wait until you show us more have a great weekend.
ReplyDeletehugs
Why don't you just print the image onto an iron on transfer, Iron it onto some fabric and then sew that piece to the quilt?
ReplyDeleteWas blog hopping and found your tutorial. Thanks, I'll have to try this. Fun alternative to other methods.
ReplyDeleteShannon
www.splatpat.com